IGEL Blog

How to Organize (and Unbury) Your Desk

Your desk is the command center of your work life and home life. Too often, it is buried with layers of archaeology. Stuff and paper litters its surface and causes productivity paralysis. In this blog I am going to show you how to UNbury your desk and what to do with all the stuff!
Have you forgotten what the wood grain of your desk looks like? Do you have to shuffle your piles to find an important document or project? If so, it’s time to clear your desk and get a fresh start!
Since your desk is an epicenter of both your personal and professional life, taking the time to organize it is incredibly rewarding. You’ll experience immediate benefits for your relatively small investment of time.
Desk organizing is a project you can tackle in 4-24 hours, depending on how much – or how little – you store on its surface and inside its drawers and compartments.
Your desk organizing time commitment is directly correlated to how much paper you have to sort. If you just have some junk and old stuff to offload, you can knock out this project in a few hours. If, however, you have gobs and layers of paper, you’re in for a longer haul.
I cover the subject of paper management in other blogs and if you’ve got a lot of it, I recommend you search this blog on the subject of “paper” and read up on that skill. Our You Tube channel also has an entire Reclaim Your Paper playlist.
Before you dive in, you’ll want to gather the organizing project supplies our Order Restorers use for our clients…
Desk Organizing Supplies
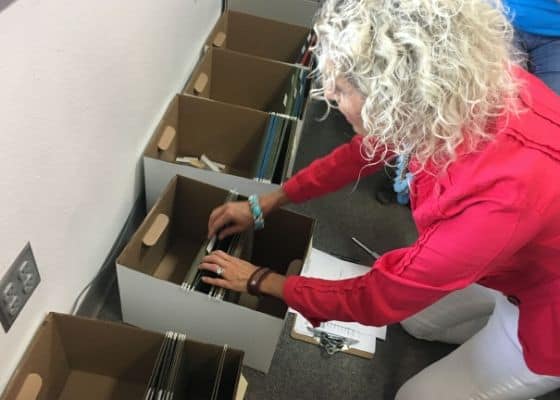
Our professional organizers keep several decluttering weapons in our arsenal. For nearly any organizing project, we are going to have to sort, sub-sort, and label the inventory we find. This is true for both belongings and documents.
To tackle Mount Desk, you will want to have the following supplies on hand:
- Trash bin (for used snack wrappers and junk you’ll discover)
- Recycle bin (to be kind to the environment)
- Shred bin (for eliminating sensitive information)
- Banker’s boxes (I recommend about 12. I know it seems like a lot, but trust me, you’ll use at least half for your paper sort alone, plus you’ll probably want one for donations)
- A marker (or more than one, since they seem to get sucked into the abyss during an overhaul!)
- Sticky notes (for labeling boxes and files)
- Blank printer paper (for labeling those banker’s boxes)
- Stapler (for affixing paper to boxes)
Now that you’ve gathered your supplies, you can begin sorting.
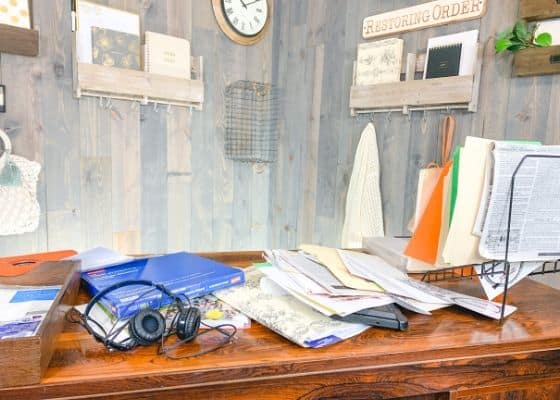
Start Two Organizing Sorts
When beginning to organize, most people just start grabbing stuff on their desk, looking at it, and trying to decide if they need it or not.
This is the WRONG way to organize! This approach will bring your progress to a crawl and leave you directionless.
Instead of starting with endless decisions, start organizing your desk by simply sorting the contents by STUFF and PAPER.
- Stuff – Your desk may be hiding everything from your kid’s homework, to snack wrappers, to a myriad of office supplies, to outdated electronics, to nail polish.
- Paper – From receipts to statements to projects to long-lost documents, your desk is a repository for paper of all kinds.
Our professional organizing consultants will often put one set of banker’s boxes on one side of the room, and the other set in a distinctively different area. This way, your stuff starts getting sorted into one “zone” and your paper starts getting sorted into another. This keeps things crisper in your mind.
Stuff Sort
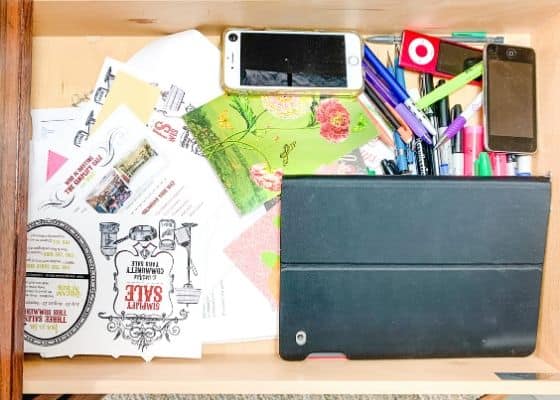
As you can see in this picture, supply drawers are often littered with a random collection of things, from old technology to a slew of pens to forgotten business cards and memorabilia.
When our Order Restorers are sorting out a desk, we separate the “chunky stuff” from paper. Stuff is everything that’s not paper. Chances are that your desk contains all kinds of equipment, personal stuff, décor items, and maybe even some unwashed dishes.
I like starting by organizing stuff because it creates momentum and it’s easier on the brain. Stuff is more obvious to categorize than paper.
Some of the stuff you pull out of your desk can simply go into a box called “Go Elsewhere” if it simply needs to be redistributed to the kitchen, bathroom, etc.
Start sorting your stuff by placing each item into a banker’s boxes by type (ie: Office Supplies, Personal Effects, Memorabilia, Electronics, etc.).
As you add each item into an empty box, label that box accordingly using your blank paper and marker, and staple the paper with the category identified onto the front of the box.
You’ll probably only end up with 4-6 boxes of categories of items.
If you end up with a box with only one item in it; don’t worry: that’s perfectly fine. Perhaps that “old office equipment” item can simply be donated.
If you find that another box (like “office supplies”) ends up overflowing, you can start a second “office supplies” box and sort PAPER office supplies into one (like nametags, notecards, notepads, labels, etc) and EQUIPMENT office supplies into another (like staplers, scissors, tools, hole punches, etc).
Office supplies and electronics are often large categories, since our needs keep changing and we often reflexively hold onto these items longer term.
Keep up your stuff sort until every item is out of your drawers and cabinets and off the surface of your desk.
Meanwhile, you’ll want to be sorting documents as they emerge from the desk abyss as well.
Paper Sort
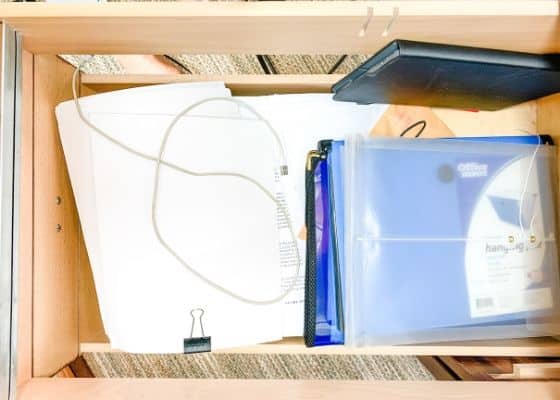
You are going to follow the same process for sorting documents as you did for sorting stuff. There is likely both paperwork ON the desk and IN the desk; as seen here in a junked-up file drawer.
Start by setting up a series of “Filing” banker’s boxes with hanging files (multiple categories will likely emerge during the sort) & drop in permanent paperwork in these boxes.
Permanent paper is that which you need to keep permanently. Think hard before keeping paper. Ask yourself if there’s another way you could get each document you’re storing: is it available online? Are you the person responsible for it? Is a printed copy necessary? Does it support your tax return?
As you come across paper-to-be-filed, it might be in a properly-labeled file already and you can just drop it in the correct category. If it is loose paper, you should take a moment in this macro sort to drop the paper into a manila file and make a temporary file label. I like using sticky notes for these temporary labels.
You’ll also need a “Projects” banker’s box with hanging files. This way, when you come across actionable short term projects that aren’t ready to be filed in a file drawer, you can place those projects into this box.
Projects have a shelf life and – once gathered up and labeled – should live on your desktop or credenza where you can see them. If they’re stuffed into a file drawer, you’ll likely forget about them.
We use the LIDS of banker’s boxes to sort really HOT paper that requires immediate processing. This way, your bills-to-be paid and active to-do items don’t get lost in a project or permanent file.
Using your filing and projects boxes and lids, sort all paper from your desk into these sorts.
Once all paper is sorted, you can begin a finer sort.
Micro-Sort and “Prune” Each Sort
We started with a macro sort to get everything in the “right bucket.” And now that all stuff and paper has been “bucketized,” and identified, you can micro-sort.
Go through each box now and do the following:
- Group similar items, like office tools or expense files
- Donate or toss unused or unnecessary items
- Thin out excessive stock of things like office supplies, forms, or paper stock
- Go through old files and completed projects and clear out old documents
- Shred sensitive items
- Rehome items that don’t belong on the desk to elsewhere in the home
The micro sort is an important process to reduce clutter and simplify that which will be added back to your desk.
You’ll find that the more unnecessary stuff you get rid of, the more clarity and simplicity you will create for yourself.
Post micro-sort, if you still need more help creating distinctive paper management systems, try this blog: https://restoringorder.com/reclaim-paper-organization/
Match Storage Needs to Furniture
To fully reclaim your workspace, you will need to create a clear and organized desktop and storage compartments. This is why our organizers completely EMPTY a desk during the sorting process. Otherwise, you will be left with some old trappings of your old workspace. Clearing everything out gives you a blank canvas.
Now that you have emptied everything, take a look at the banker’s boxes of stuff and paper you have whittled down. Review this inventory of stuff and current paper and compare to your desk features.
Ask yourself some critical questions about your current desk:
- Does your desk offer sufficient supply drawers and file space?
- Will you have enough room to reload everything that you are keeping in an organized manner?
- Do you have enough surface workspace to spread out a project and work?
As you consider these questions, you may need to retrofit your current desk with a file cart beneath it to expand file space or acquire drawer organizers or desktop accessories to organize supplies. Or, it may be time to acquire a new desk to suit your current needs.
If your desk is serviceable but doesn’t offer quite enough file space, you could also get adjacent furniture to expand storage or even workspace. I have set up many credenzas, hutches, and lateral file cabinets to afford extra storage and surface space for my clients.
Reload Desk Contents
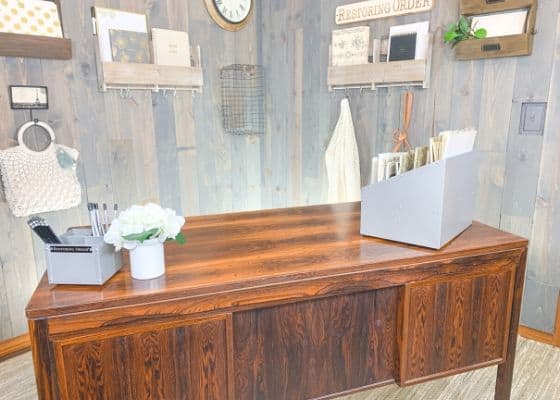
Now comes the fun part!
Your desk re-organization is rounded out as you reload your belongings and neatly organized paperwork.
Reload your supplies from your banker’s boxes into supply drawers using organizers as needed.
Keep the active paper “above ground” on your desktop in a Project Center (shown in this picture, for short-term projects) and an Action Center tray system for hot items.
File the completed paper “below ground” in file drawers to keep a clear distinction in your mind.
Reload labeled reference files into file drawers. Most people have between 4-6 file categories. You could keep the most referenced files in your desk drawer(s), and less referenced files in another file cabinet.
Finally, add a personal touch (but not too many) to your desktop like a bouquet of flowers or pencil organizer. Creating an attractive surface will discourage future “dumping.”
Once you have performed a desk reclamation, you will become committed to keeping up your workspace. Organizing your desk will pay dividends in peace of mind and streamlined work.
Congratulations on organizing your desk!
